Ultimate Guide: How Do You Level a Dirt Road Efficiently
How do you level a dirt road efficiently? The way might appear to be a simple one: how do we change this bumpy, uneven path into the safe and smooth roadway it is meant to be? It's like driving down a rural road, feeling everything shake and rattle. It is one of the most unpleasant feelings imaginable. But therein lies the art of leveling a dirt road, an art as intriguing as it is crucial.
Comfort is not the only issue when leveling off a dirt road. There are also safety, durability and accessibility aspects to consider. From narrow back lanes to wide farm roads, correct leveling can greatly increase the life of a road while making it smoother to travel. This process is essential to understanding whether you're a landowner, an ordinary member of the community or just someone curious about road maintenance. This guide will take you into the nitty-gritty of how to level a dirt road.
Understanding the Basics of Dirt Road Leveling
Before we get stuck into the how-to, let's lay some groundwork. Dirt road leveling is like learning the ABCs before writing a novel. It's the foundation upon which everything else stands. Let's take a look at what exactly dirt road leveling is and why it should be so important to anyone concerned with these paths.
What is Dirt Road Leveling?
Dirt road leveling is something like cutting a wild mop of hair. It is the process of cutting out high spots and filling in low ones on a dirt road to make it smooth and even. This usually comprises scraping, grading and sometimes compaction of the road's surface. It's a delicate balance between removing enough material to level the road and maintaining enough to ensure a durable surface. As a haircut enhances the look of a person, proper leveling can improve not only how well but also how long the road will perform.
Leveling Your Dirt Road: Why?
What need is there to level a dirt road? Well, the reasons are as clear as day:
Safety: A level road is a safer road. Many accidents can be traced back to uneven surfaces, so those bumps and dips must be smoothed out.
Comfort: Frankly speaking, no one likes driving on a bumpy road. This results in a smoother ride, saving you and your car from the throes of an unbearable jolting.
Maintenance: In fact, frequent leveling can reduce the need for more intensive treatment later on. It is an active road care strategy.
Accessibility: Good roads improve access, which is important for remote areas where these roads are often means of life.
Step-by-Step Guide: How Do You Level a Dirt Road?
Now, let's tackle the main question: How do you level a dirt road?
Initial Assessment and Planning
The journey to a properly graded dirt road begins with this sharp eye and firm plan. So, have a good look at the road. Focus on the places that are above or below average. Any drainage problems, or places that are always a headache? This first assessment is like reading a road's history. It indicates what needs repairing. Next, plan your approach. Figure out when and how you'll approach the project. Weather conditions and tools are all factors to be considered. Good planning's half the battle won, remember. You equip yourself with a sharp appreciation of the condition of that bumpy path, and then go forth purposefully on your smooth route.
Selecting the Right Tools and Equipment
Getting the right tools and equipment is important. Here's a rundown of what you'll need:
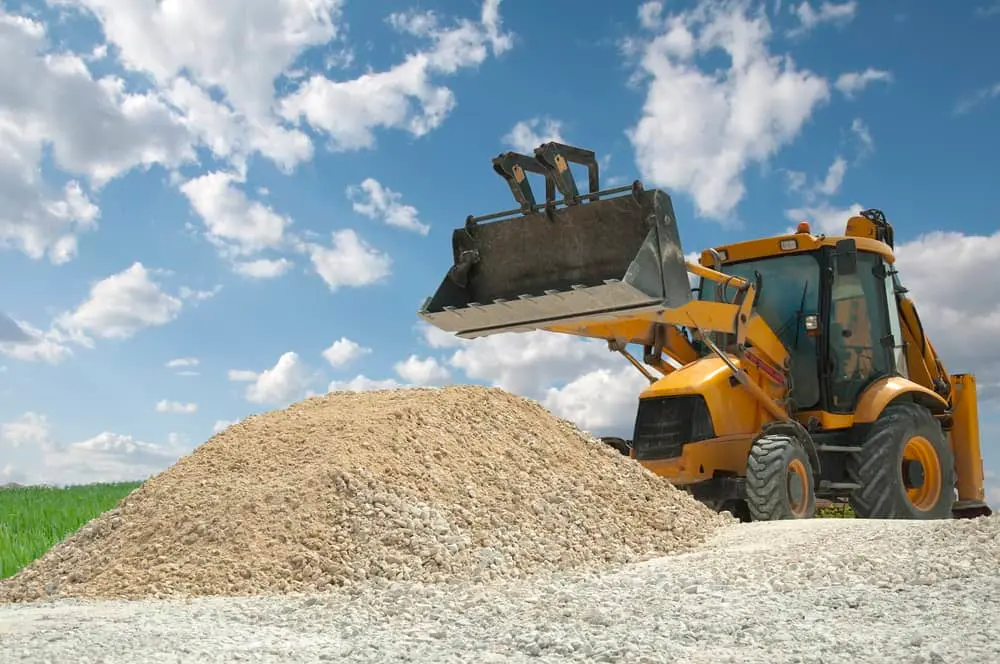
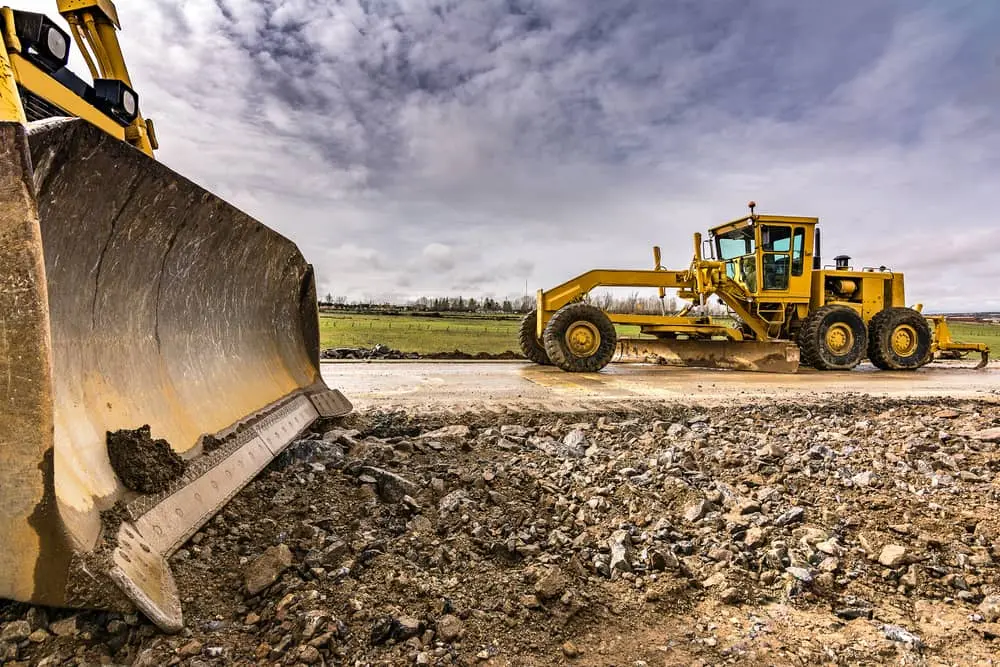
Grader: A grader, the star of the show, is indispensable for scraping and leveling.
Roller: Once graded, a roller compacts the surface to make it more durable.
Shovel and Rake: Finer adjustments, spreading materials.
Water Truck (optional): If dust is a problem, water trucks can help keep it in check.
Each tool has its own special function. The grader does the hard work, scraping off high spots and moving dirt around. The roller packs the loose dirt so that there is a firm, enduring road surface. Meanwhile, shovels and rakes are good for finishing touches-handling the smaller details. If dust does become an issue, a water truck can moisten the road and reduce airborne particles. When put together, these tools comprise an effective arsenal for taking on anything the road may throw at you.
Executing the Leveling Process
Now equipped with your plan and the proper tools, it is now time to put on work gloves and get down to business leveling. At this stage, the magic takes place: a crude, uneven road becomes even. Here's how to do it:
Start with Grading: First, use the grader to remove the high spots (bald peaks) and fill in the low ones. Proceed at a walking pace, covering the whole road evenly. You can think of it as smoothing the road, shaping it to your satisfaction.
Check for Consistency: Check your progress periodically along the way. Search for any unfinished spots or places that need more attention. It is like proofing an essay. You don't want to miss any errors along the way.
Compact the Surface: When you're happy with the grading, have in the roller. Proper compaction makes your work hard and the road strong, reducing wear. It's like putting the finishing touch on all your hard work.
Finishing Touches: Make any final adjustments with your shovel and rake. This is the time for fine-tuning with every inch of the road just right.
Assess and Repeat if Necessary: Look one last time along the road. If you see anything that's not quite right, don't be afraid to go over it again. Patience is the key. Quality work does not come overnight.
Helpful Tips: How Do You Smooth Out a Dirt Road
Ever tackled the challenge, "How do you smooth out a dirt road?" It's not just about using heavy equipment and working really hard. This isn't just about big things. It's also about little things, even tiny ones, that add up in the end.
Regular Maintenance Practices
Think of your dirt road as your favorite pair of jeans. You have to maintain them regularly to make them look good. Here's your go-to maintenance :
Grade Regularly: Think of grading as giving your road a gentle massage, smoothing out those lumps and bumps.
Watch the Water: Just like an umbrella keeps you dry during the rain, good drainage helps to keep the roads dry after rain. It will keep our house from getting damp and moldy.
Dust Control: Should your road release more dust as a cowboy at the rodeo, then perhaps it's required to water it down or control dust from it.
Quick Fixes: Fixing the rough spots and potholes promptly is similar to repairing a leaky roof. It eliminates a lot of stress in the future.
Advanced Techniques for Smoother Roads
Stabilizers and Binders: These are the things that make the road more resilient and equipped to handle any circumstance.
Right Material for the Top Layer: This is just like selecting the ideal flavor for a burger. Material choice plays an important role in end product quality. Fine gravel or other suitable materials can make all the difference.
Specialized Equipment: Having the right tools and resources is really important when it comes to getting things done. Specialized gear can be a game-changer for those tricky spots.
Ask the Pros: When unable to figure out a solution on your own, turn to the experts for their assistance. An expert's guidance can greatly simplify one's life which makes it very helpful.
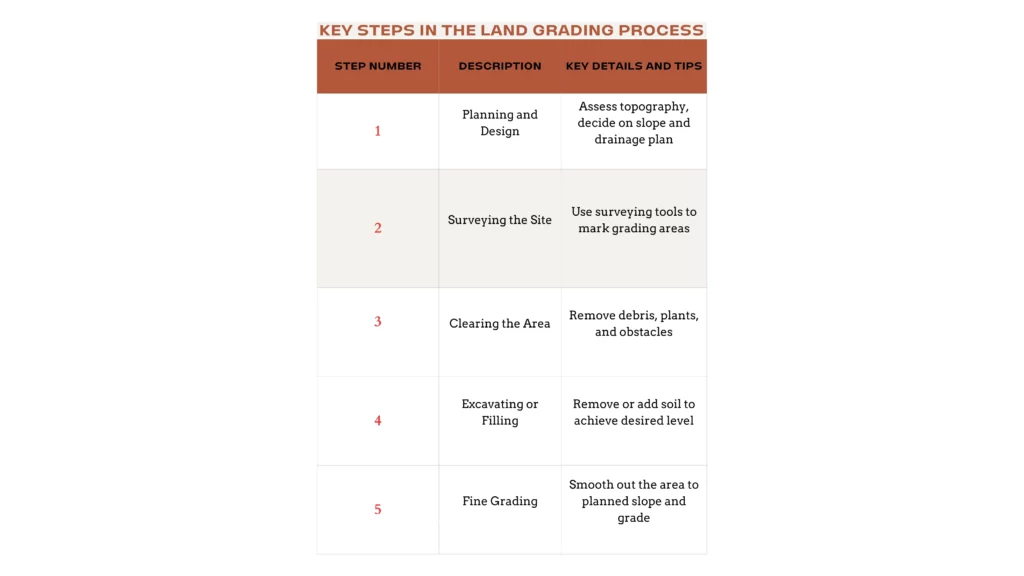
How Do You Grade Land Properly
When you ask, "How do you grade land properly?" you're opening a chapter in a story where precision meets the earth. Land grading is way more than just digging and shifting soil; it requires an artful blend of working in harmony with nature and meeting specific requirements.
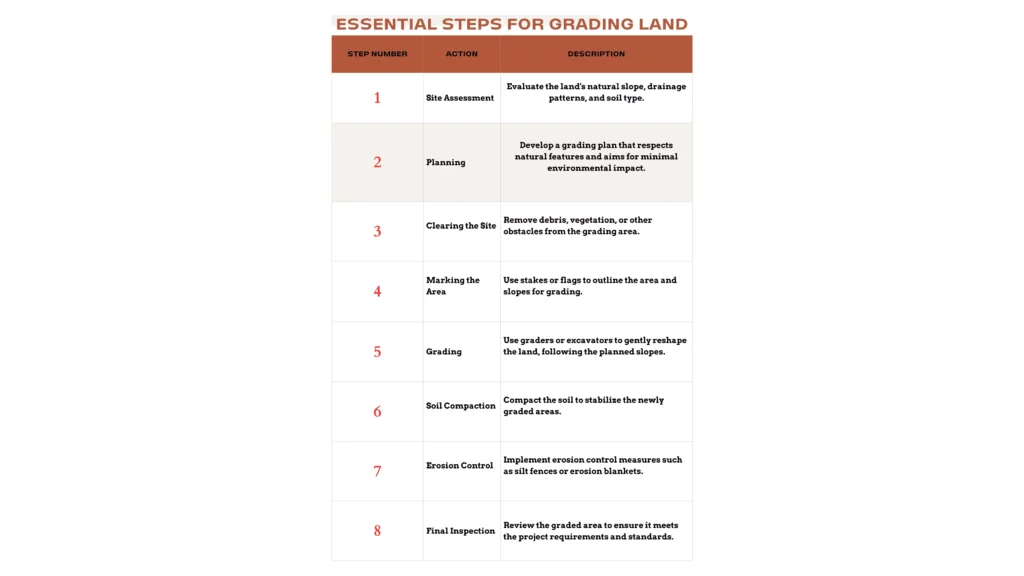
You should start by comprehending the terrain and its natural drainage flows. It's like having a best friend – what makes it tick, where it slopes, and where water likes to gather. Then, plan your grading. This project should focus on improving the natural flow of water, rather than attempting to stop it. Use equipment like graders and excavators, but treat them like paintbrushes, subtly shaping the land. The task is to design a slope that allows water to flow away from buildings without causing any damage to the ecosystem. If done correctly, the grading process can create a peaceful and refreshing landscape that is both productive and harmonious.
Paving the Path to Success: Your Dirt Road Mastered
After finishing our project, we learned "How do you level a dirt road," and how to make it safer for people to travel. Every stage, from the evaluation to the assessment of the tools, is crucial in the creation of a road that is reliable and durable.
Now it's your turn to try these techniques and witness the changes. A smooth and level road makes every journey more pleasant for riders. If you need an expert hand, you can trust Shilling Excavation. Our skills and commitment can transform your tough obstacles into an easy journey. Take each step carefully and make sure that the road is even and safe.