Pouring a concrete driveway takes meticulous planning and timing. The incorrect weather conditions might cause cracks and costly repairs. Temperature, preparation, and scheduling all have an impact on the end output. Homeowners in Robinson, TX need to know when they should start this job. Smart timing ensures that your driveway is robust and lasts for decades.
Why Timing Matters for Concrete Driveways

Concrete doesn’t dry like paint. It cures through a chemical process that builds strength over time. The curing process depends heavily on weather conditions. Too much heat makes concrete cure too fast at the surface. This causes shrinkage and cracking. Cold temperature halts the curing process completely. Water in the concrete mixture can freeze and weaken the entire slab. Rain or frost in the first 48 hours disrupts surface finishing. You’ll end up with an uneven, weak surface.
The climate in Central Texas creates unique challenges. Summers are hot and dry. Winters stay mild with occasional freezes. This means you can pour most of the year. But you need extra preparation during extreme temperature ranges. Professional contractors watch weather patterns closely. They plan projects around weather conditions to ensure proper strength gain.
Ideal Weather Conditions for Concrete Pouring
Several factors determine the best time to pour. Air temperature should stay between 50°F and 85°F during concrete pouring and the first few days. This range lets the chemical reactions work steadily. Below 40°F, curing slows or stops entirely. Above 90°F, the concrete mixture sets too quickly. The concrete temperature itself matters too. Contractors use chilled water or ice in hot weather. Most experts call 50°F to 80°F the sweet spot for concrete placement.
Humidity affects how fast moisture leaves the surface. Low humidity speeds up the evaporation rate. This causes the surface to cure too fast and develop cracking. Very high humidity slows the drying process down. Around 40% to 60% humidity works best for concrete curing. Wind speed creates problems on breezy days. Strong winds act like a hair dryer on wet concrete. This increases cracking risk significantly. Hot, windy days need special surface protection. Windbreaks or tarps help manage these weather conditions.
No rain should fall during the pour or initial curing. Wet weather dilutes the water content and ruins surface finishing. Check the forecast for at least 24 hours ahead. Avoid pouring if temperature will drop below freezing within 48 hours. Even light frost damages early-stage concrete badly.
Soil conditions matter as much as weather. The ground should not be muddy from recent rain. A site evaluation helps identify drainage issues before base installation begins. Frozen soil must be thawed before concrete delivery. Otherwise, the concrete on top cures improperly.
Best Seasons for Driveway Construction
Spring: Mild Weather with Rain Risks
Spring offers near-perfect conditions for concrete placement. Temperature stays moderate, promoting steady curing. Cooler weather reduces rapid evaporation. The concrete surface stays moist longer. This prevents immediate shrinkage and cracking. Spring’s moderate temperature gives more working time for surface finishing. The concrete mixture maintains better workability than in summer heat.
But Texas spring brings frequent storms. Watch the forecast carefully before scheduling your pour schedule. Rain within a day or two can ruin fresh concrete. Make sure drainage is working and ground isn’t saturated. A waterlogged base compromises concrete foundations. Plan for a dry weather window with proper preparation.
Summer: Heat Management Required
Summer provides dry days and long daylight hours for driveway construction. Rain delays happen less often during this season. Extended sunlight helps with larger projects. But high temperature above 90°F causes problems with the concrete mixture. Hot, dry air accelerates moisture loss. The mix can flash set before crews finish working.
Pour early morning or late afternoon to avoid peak heat. Many Texas crews start at dawn for better timing. Contractors use several techniques to manage heat. They apply curing compounds to slow water loss. Some use cooled aggregates in the mix. This keeps concrete temperature down during placement. Proper concrete curing prevents summer problems. With good planning and preparation, summer pours work fine.
Fall: Prime Season for Quality Results
Fall ranks as the best time for most concrete projects in Texas. Temperature drops to comfortable ranges perfect for curing. The weather stays stable with less rain than spring. You get predictable conditions for scheduling. Cooler air prevents rapid surface drying. The concrete develops strength evenly throughout the slab.
Fall provides ideal workability for crews. The mix stays consistent from concrete delivery through surface finishing. This season reduces stress on the concrete contractor and material. Quality results come easier when weather cooperates with your timing. Plan your driveway construction for September through November. This scheduling gives you the best chance for success.
Winter: Possible with Precautions
Central Texas winters stay mild compared to northern states. You can still pour with proper preparation. The main concern is overnight temperature drops. If it falls below freezing, young concrete gets damaged. Use insulation blankets for surface protection. Keep the slab covered for several days after pouring.
Some contractors add accelerators to speed up the process. These additives help concrete gain strength faster in cold weather. Winter pours need experienced crews who know best practices. The timing of each step becomes more critical for planning. Check the forecast for the entire week ahead. Avoid pouring if freezes are predicted within 48 hours.
Preparation Steps for Success

Good preparation prevents most common problems. Start with proper site evaluation to check base installation needs. The driveway size determines how much material and time you need. Larger projects require more careful planning and scheduling. Excavate to the right depth for your climate. In Texas, 4 to 6 inches works for most residential projects.
Base installation provides crucial support. Use crushed stone or gravel compacted firmly. Proper base installation ensures long-term stability. Drainage prevents water from pooling under the slab. Grade the base away from buildings. Install edge drains if needed for better drainage. Set forms straight and level. They control the shape and thickness of your pour.
Place reinforcement to control cracking. Wire mesh or rebar helps hold concrete together as it cures. The reinforcement placement matters for long-term durability. Position reinforcement in the middle third of the slab depth. Proper reinforcement prevents random cracking patterns.
Choose the right concrete mix design for your project. Discuss options with your concrete contractor for best results. The mix proportions affect strength and workability. Higher slump makes placing easier but can reduce final strength. Most projects use a 4 to 6 inch slump. This provides good workability without excess water content. Test slump when each truck arrives during concrete delivery. A slump test measures workability simply. The mix should hold its shape without being too stiff or soupy. Proper slump ensures good concrete placement and surface finishing. Calculate your project timeline realistically. Include time for base installation, curing, and finishing work. Weather delays can extend your schedule with poor planning.
During the Pour: Best Practices
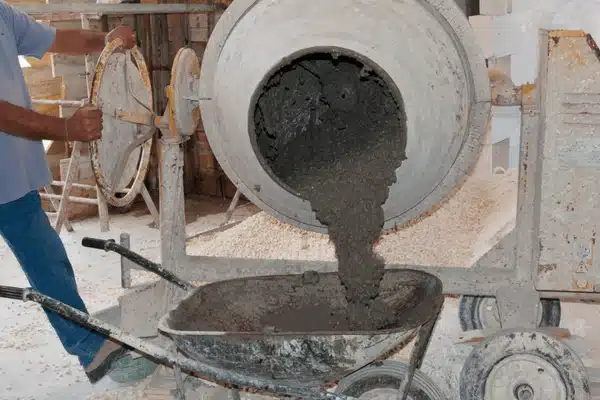
Begin with fresh concrete from a trusted supplier. Concrete delivery should occur within 90 minutes of mixing to ensure proper workability. Old concrete reduces its workability and strength. If the concrete delivery is delayed, reject it and reschedule. Pour in parts if your driveway is large. This keeps the material workable throughout the process and improves timing.
Work quickly but carefully during concrete placement. Spread the mix evenly across the forms. Test slump consistency throughout the pour. Don’t add extra water to make finishing the slump easier. This weakens final strength and increases cracking risk. Maintain proper mix proportions at all times. The slump should stay consistent. Too wet causes segregation. Too dry makes surface finishing difficult. Check slump readings regularly for quality results.
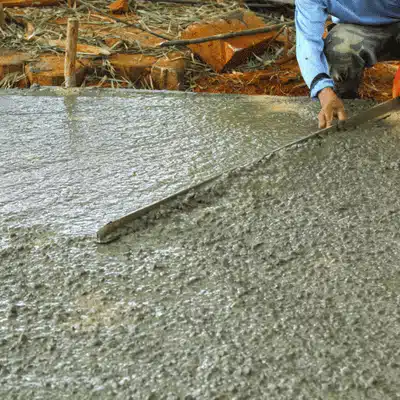
Use vibrators to remove air pockets. This step improves density and strength. Strike off the surface level with the forms. Wait for bleed water to disappear before final finishing techniques. Starting too early traps water at the surface. This causes a weak top layer later. Patience during finishing techniques pays off. Create control joints to manage cracking patterns. Space joints every 8 to 10 feet in both directions. Proper reinforcement helps control movement. But control joints remain your main defense against random cracking problems.
Apply surface protection as soon as the finish is complete. This stage is crucial to optimum strength development. It stops the surface from drying too quickly.
Curing: The Critical Final Step
Concrete Curing: The Critical Final Step
Critical Curing Tips
Avoid Direct Sun
Shade the concrete to prevent rapid surface drying and cracking.
Prevent Frost
Keep blankets on during cold nights to avoid freeze damage.
Maintain Moisture
Never let the surface dry out during the first week of curing.
Wait Before Driving
Give concrete 7 days minimum before parking vehicles on it.
The curing process determines your driveway’s final strength and durability. This process takes at least seven days for proper concrete curing. Keep the surface moist during this time. Spray it with water several times daily. Cover the slab with plastic between waterings. Curing compounds offer an easier option. These liquids form a protective film on the surface. They slow moisture loss dramatically.
In hot weather, extra moisture helps prevent cracking. Keep the slab shaded if possible. Direct sun can overheat the surface despite other surface protection methods. In cold weather, insulation blankets maintain stable temperature. They prevent frost damage during night hours. Avoid sudden temperature swings during curing.
Don’t let anyone walk on the concrete for 24 to 48 hours. Wait at least seven days before driving. The concrete reaches about 70% strength by then. Full strength takes 28 days to develop. Heavier vehicles should wait longer if possible for better results. Proper curing methods make all the difference. A well-cured driveway resists wear and lasts decades with minimal maintenance.
Planning for Long-Term Success
Pick the right season for your project. Spring and fall offer the most stable weather conditions for concrete placement. Summer works with early morning pours and heat precautions. Winter requires insulation and experienced contractors for proper planning. Always check the forecast before scheduling. Ensure dry, mild weather for several days around your pour schedule. Be ready to reschedule if conditions change. A short delay beats a failed slab every time with better planning.
Prepare your site thoroughly before concrete delivery. Excavate properly and compact a solid base with multiple passes during base installation. Install good drainage to prevent water problems. Set forms level and place reinforcement correctly for strength. Use quality materials and proper mix proportions. Don’t cut corners on concrete mix design or base installation work.
Work efficiently during the pour. Don’t add extra water to make things easier. Proper finishing techniques prevent surface defects. Cure the concrete diligently for at least seven days. This step ensures proper strength gain and quality results. Protect from weather extremes during curing. Keep the surface moist in heat and insulated in cold temperature.
Hire an experienced concrete contractor who knows local conditions. Professionals understand best practices for Central Texas climate and proper timing. They handle unexpected challenges like weather changes or moisture content issues. Their expertise ensures quality results every time. At Shilling Excavation, we consider all factors when planning your project. We check outside conditions and weather patterns before scheduling your concrete delivery. This careful preparation means your driveway turns out strong and lasts for years. Our team follows best practices for every step.
Ready to Start Your Project?
Don’t leave your driveway to chance. Contact Shilling Excavation today for a free consultation. Our team has years of experience with concrete projects in Central Texas.
We’ll evaluate your site and recommend the best timing for your pour. Call us now or visit our website to schedule your driveway construction project.
Frequently Asked Questions
What’s the best temperature for pouring a concrete driveway?
The ideal range is 50°F to 85°F during pouring and initial curing. This temperature allows steady curing without freezing or setting too fast.
How long does concrete need to cure before I can drive on it?
Wait at least seven days before driving on your new driveway. The concrete reaches about 70% strength by then for safe vehicle use.
Can you pour concrete in summer heat?
Yes, but you need special precautions like early morning pours and curing compounds. Professional contractors manage summer heat with proper planning and timing.
What happens if it rains on fresh concrete?
Rain within the first 24 hours can weaken the surface and ruin the finish. Always check the forecast and cover concrete if unexpected rain occurs.