7 Expert Tips: What is the Most Efficient Way to Clear Land

Clearing land is a fundamental step in preparing a site for various purposes, whether for construction, agriculture, or landscaping. Finding what is the most efficient way to clear land is crucial for project managers, property owners, and developers to save time and resources and ensure environmental compliance.

what is the most efficient way to clear land

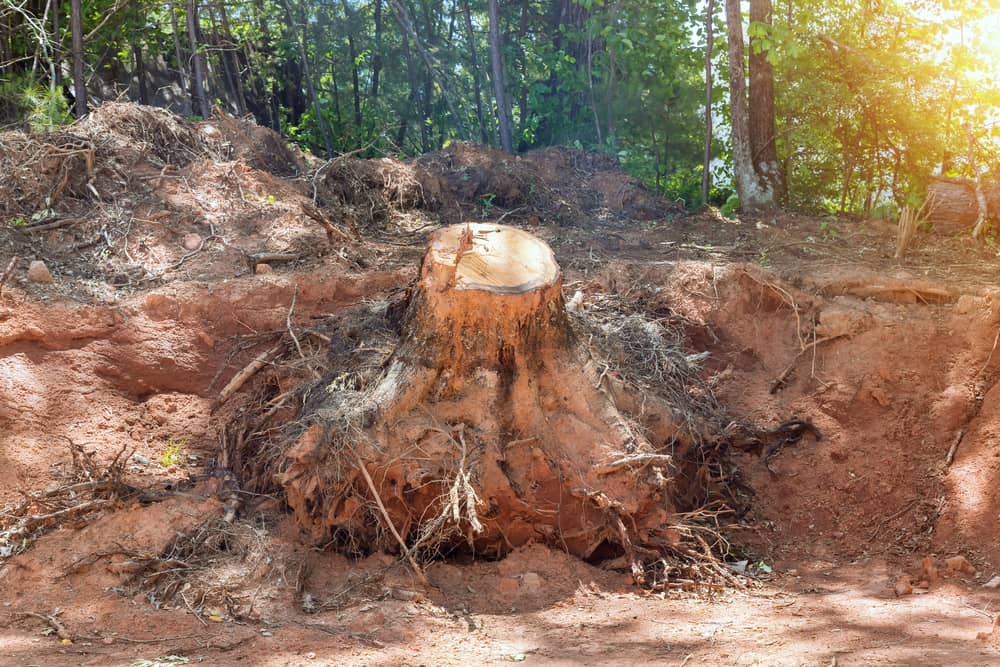
This process involves removing trees, brush, stumps, and other obstacles that impede construction or farming activities. However, the efficiency of land clearing depends on various factors, including the size of the area, the type of vegetation, and the intended use of the land.

In this blog post, we will explore 7 expert tips that highlight what is the most efficient way to clear land, offering insights into methods that balance speed, cost-effectiveness, and ecological sensitivity.

Our goal is to provide practical advice that can be applied to your next land-clearing project, ensuring that you achieve the best possible outcomes with minimal hassle.

What is the Most Efficient Way to Clear Land

When tackling the task of preparing a site, the question of what is the most efficient way to clear land often arises. Efficiency in land clearing is not just about speed; it's about minimizing environmental impact, reducing costs, and ensuring the land is ready for its next use as quickly as possible. Here are seven expert tips to achieve this:

1. Conduct a Detailed Site Assessment

7 key tips for efficient land clearing infographics

Start with a thorough evaluation of the area. Understand the terrain, identify types of vegetation, and note any obstacles. This knowledge helps choose the most effective clearing method and equipment, ensuring the job is done right the first time.

2. Select Appropriate Equipment

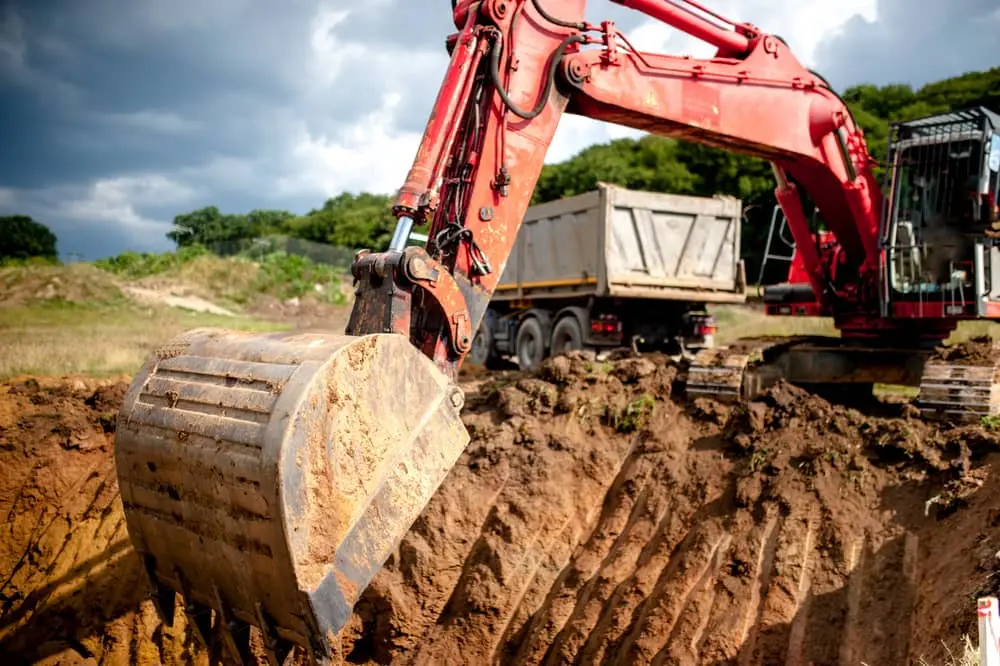
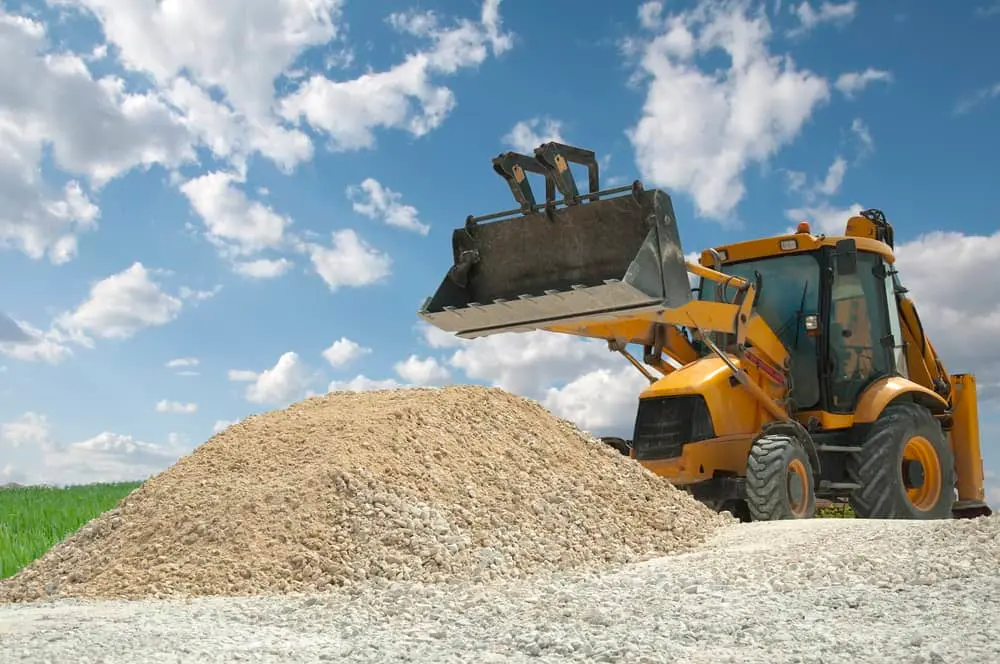
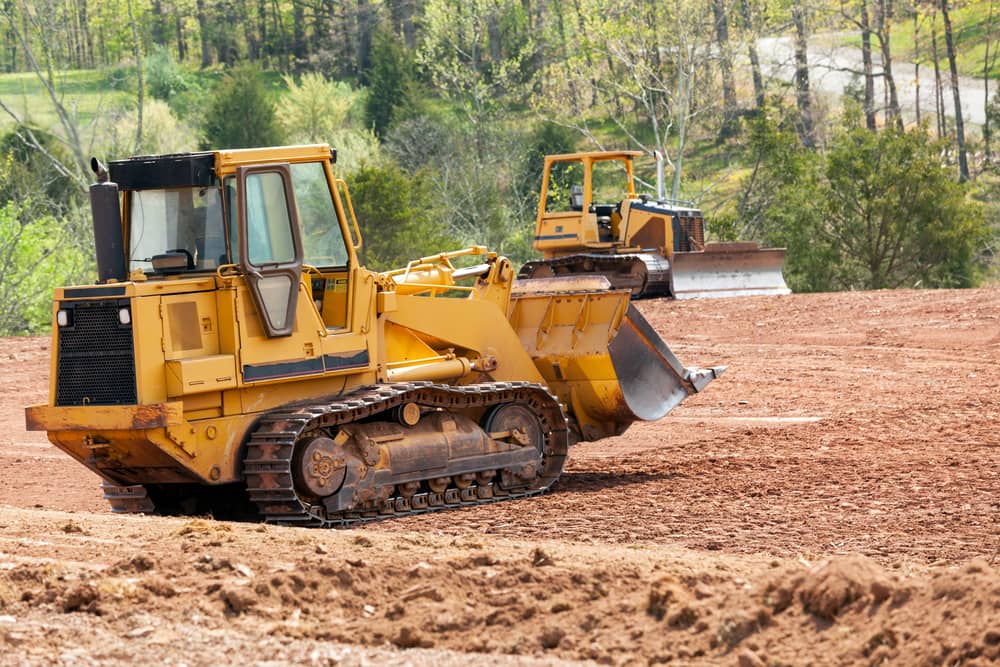
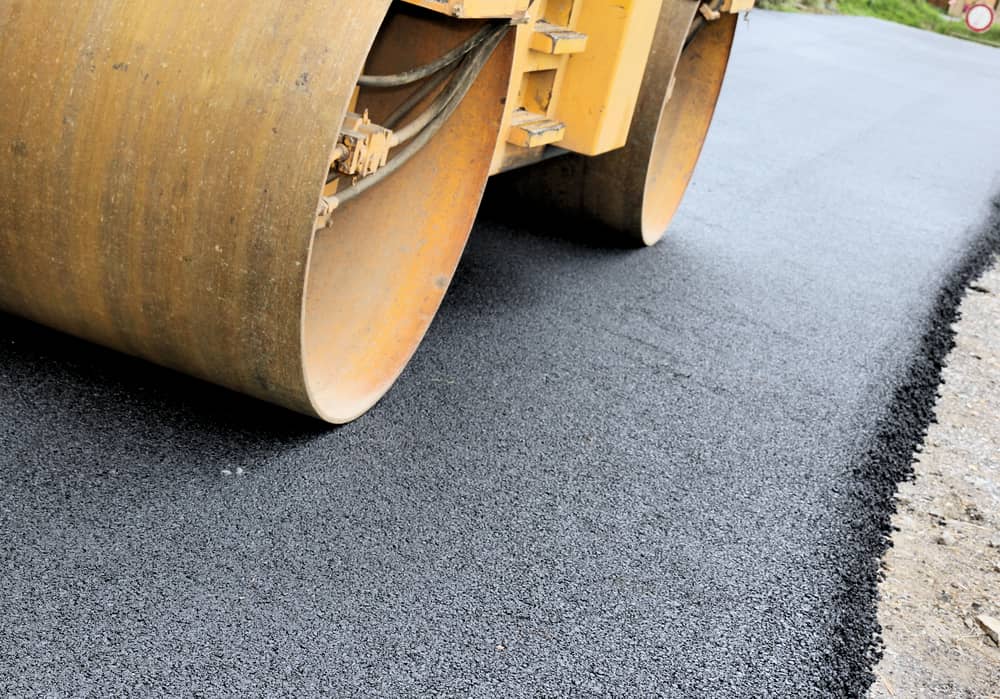
The right machinery makes a significant difference. Heavy machinery like bulldozers or excavators may be required for extensive, densely vegetated areas. In contrast, smaller plots or areas close to structures might benefit from hand tools or smaller machines to reduce the risk of damage.

3. Apply Sustainable Clearing Techniques

Opt for methods that preserve the ecosystem as much as possible. Techniques such as selective clearing, where only certain trees are removed, help maintain the land's ecological balance. This approach also reduces the amount of debris needing disposal, saving time and resources.

4. Engage Professional Services

Experts in land clearing can dramatically increase efficiency. Their experience, knowledge of local regulations, and access to various equipment types ensure the job is completed efficiently and compliantly.

5. Break the Project into Phases

Dividing the work into manageable sections allows for better planning and execution. This phased approach helps deal with unexpected challenges and ensures that every part of the project receives the attention it deserves.

6. Efficiently Manage Debris

Efficient debris management is crucial. Options include burning (where allowed), chipping on-site, or transporting debris for disposal. Each option has advantages, and the best choice depends on the project size, location, and environmental considerations.

7. Plan for Erosion Control

After clearing, implementing erosion control measures is essential to protect the land. Techniques such as hydroseeding or installing silt fences can prevent soil erosion, preserve the site's integrity, and prepare it for future development or landscaping.

Incorporating these tips into your land-clearing project can significantly enhance efficiency. By carefully planning, using the right tools for the job, and considering the environmental impact, you can answer the question of what is the most efficient way to clear land with confidence, ensuring your project's success from the ground up.

What Is the Fastest Way to Clear Land

When looking for the fastest way to prepare your land for a new project, employing the right strategies is crucial. The essence of speed in land clearing lies in the combination of advanced machinery, skilled professionals, and thorough pre-planning.

Utilizing Heavy-Duty Equipment

yellow bulldozer clearing land

Bulldozers, excavators, and tree shears are designed to tackle vast areas quickly, dealing with large trees and dense brush. Their power and efficiency can drastically reduce the time needed for clearing.

Expertise Makes a Difference

Hiring a team with extensive experience in land clearing can significantly accelerate the process. These professionals understand how to navigate various terrains and obstacles, ensuring the work is done swiftly and effectively.

Pre-planning is Essential

A detailed plan that includes assessing the site, securing necessary permits, and preparing the area for easy machinery access can prevent delays. This proactive approach ensures the clearing process's fastest possible start and continuation.

Efficient Debris Management

Choosing the proper method for dealing with the removed vegetation—whether chipping on site, burning (where allowed), or hauling away—can keep the project moving without interruptions. This consideration is vital in maintaining momentum and avoiding potential bottlenecks.

Balancing speed with attention to detail and environmental considerations ensures that what is the most efficient way to clear land aligns with both project timelines and sustainability goals. This approach not only achieves quick results but also prepares the land for its next phase of development or use, reflecting a comprehensive understanding of efficiency in land clearing practices.

What is the Most Efficient Method of Clearing Land for Construction

When preparing land for construction, it's vital to approach clearing with a strategy that aligns efficiency with future development plans. The most efficient method involves precise planning, technological assistance, and environmental consideration. Here's how to achieve this balance:

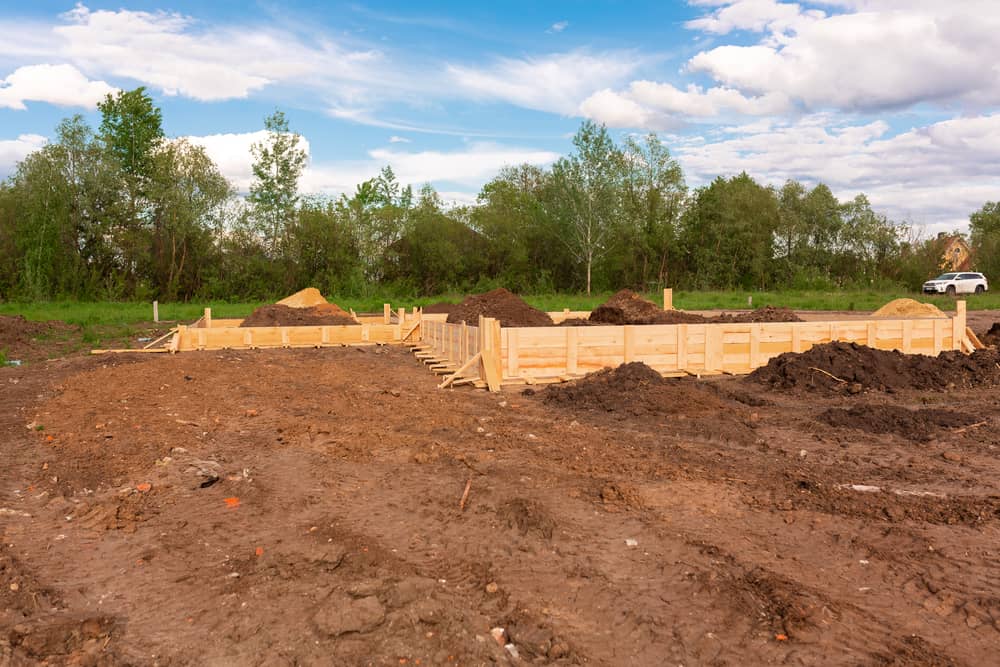
Initial Site Assessment

A thorough site evaluation is crucial to identify areas that require clearing and those that can be preserved. This assessment helps in minimizing unnecessary disturbance to the land.

Selective Clearing

Instead of clearing the entire plot, selective removal of trees, bushes, and other vegetation can save time and resources. This approach also retains the natural landscape features beneficial for the construction project.

Advanced Machinery

Utilizing GPS and other advanced technologies in machinery allows for precise clearing. This precision ensures that what is the most efficient way to clear land is also aligned with the construction blueprint, avoiding the need for rework.

Recycling Cleared Materials

Turning cleared vegetation into mulch for site use reduces waste and can help in soil stabilization and erosion control, contributing to the efficiency of the clearing process.

Soil Erosion and Sediment Control Plans

Implementing these plans from the outset minimizes the impact of clearing activities on the site. It ensures that the land remains stable and suitable for construction activities, avoiding potential delays.

Incorporating these practices into the land clearing process for construction not only answers the question of what is the most efficient way to clear land but also sets a solid foundation for the subsequent phases of the construction project. This methodical approach ensures that the site is prepared in a manner that respects environmental considerations while meeting project timelines.

Final Thoughts

Understanding what is the most efficient way to clear land is pivotal for the success of any project requiring land preparation. This blog has outlined several key strategies, emphasizing the importance of meticulous planning, the application of advanced clearing techniques, and adherence to environmental and regulatory standards.

These practices are not merely about removing obstacles from a site; they're about doing so in a way that lays a solid foundation for whatever comes next, whether it's construction, agriculture, or landscaping. Implementing these strategies can significantly improve project efficiency, cost management, and environmental conservation.

As projects progress, the choice of partners and service providers becomes crucial. In this context, Shilling Excavation stands out for its commitment to these principles. Offering expertise, technology, and a deep respect for the environment, they ensure that your land-clearing needs are met with the utmost efficiency and sustainability.

Choosing Shilling Excavation means selecting a partner who understands the nuances of efficient land preparation, making them an invaluable asset for any project.

What Are the Procedures for Excavation: The Basics and Safety Guidelines

Whether constructing a commercial or residential building, roadways or bridges, or installing pipes and underground utility lines, inspecting and preparing the land to ensure a sturdy foundation is critical; excavation is an important aspect of any construction project, involving various tools and techniques to shift soil, rock, and materials, creating a cavity, and preparing the area for construction.

For building projects, construction firms use a variety of excavation types. The material and the aim of the excavation determine the type of excavation utilized. So, what are the procedures for excavation? And are there other types of excavation?

Here are some types of excavation in construction classified based on material and purpose:

Excavation by Material

Topsoil Excavation

What are the procedures for excavation? Excavation involves several processes.

As the name implies, this excavation process involves removing the outer or upper part of the earth's surface. The excavation procedure eliminates plants, soil, and other decaying debris that may render the site unfit for structural loads.

Rock Excavation

Excavating in this method is used for surface cleaning, particularly on difficult areas that impede construction. The level of difficulty of rock excavation exceeds that of other approaches. It is mostly because specialized tools and processes, such as drilling or blasting, are required to remove the rock and clear a durable surface.

Muck Excavation

Muck, the combination of soil and water, is often undesirable during construction and needs to be removed. Muck excavation is named after the material being removed. The muck is either moved to another area or spread out to dry.

Earth Excavation

To create a foundation for buildings and bridges or construct drainage ditches, various layers of earth need to be removed. Earth excavation includes the removal of soil, the layer below the topsoil, for construction.

Excavation by Purpose

Cut and Fill Excavation

Stripping excavation, also called by that name in construction, is applied to clear expansive spaces. The method removes broad and superficial layers of topsoil, rocks, sand, and other undesired substances. This process might additionally encompass leveling the terrain.

Trench Excavation

In this type of excavation, the dug area's length is more than the depth. Trench digging is commonly applied to bury service lines, set up pipelines and sewer systems, or place foundations. This digging is used for shallow trenches below 6m or deep trenches surpassing 6m in depth. The techniques used for this type depend on factors like the purpose, ground conditions, number of obstructions, etc.

Basement Excavation

Usually, the basement is the space beneath the ground level. This excavation happens when the building is at least partly below ground. The complexity of this excavation varies depending on the property size. It can get intricate, considering the size of the property and the excavation needed.

Dredging

Dredging is one of the kinds of excavation.

As time passes, sediment accumulates underwater, creating challenges for construction and navigation. Dredging is digging and clearing sediments and debris from underwater areas, facilitating smooth passage for boats and ships, and serving other construction needs.

What Are the Procedures for Excavation?

To overcome whatever hindrances occur and complete a construction project successfully, five main steps have to be accomplished:

What are the Safety Procedures for Excavation?

Competent Person Inspection

A competent person must inspect all excavations and trenches before workers can enter such worksites. After rainstorms or floods, a qualified person must check excavation sites to confirm stability before work resumes.

There should be safety measures in excavation sites.

Adequate and Clear Entry and Exits

OSHA calls it access and egress. People working in trenches need an open way in and out. Make sure nothing is blocking the entry, like materials or tools. If the trench is 4 feet deep or more, workers should have a ladder, stairs, a ramp, or something similar to leave the site.

Exposure to Falling Loads and Falling Objects

Keeping heavy excavation equipment and materials away from the edges of excavation and trench sites is crucial to protect people from risks. Ensure excavated soil, stones, and other materials are kept at least 2 feet away from trench edges to prevent them from sliding and falling on peope below. Everyone should also be cautious about working beneath suspended materials and loads.

Protective Systems to Prevent Cave-ins

OSHA recommends a protective system from soil movement and cave-ins in trenches and excavations.

Worker Training

Training workers to know the hazards and safeguards needed when working at excavation and trench worksites is also crucial to ensure their occupational safety and health.

What Should Occur Before Beginning An Excavation?

When it comes to a piece of land you want to develop, you must first prepare the site for excavation. This seems like a simple process, but there's more to it than you might think, and it's a vital step in the overall process.

If you're looking for a professional excavating company to deal with all of the aspects of your site, contact Shilling Excavation to get the job done. The following are the major steps for excavation site work.

Site Surveying

A surveyor will come to the site to ensure it is in the right location and within the parameters and boundaries it is supposed to be within. They will place markers around the site to guarantee the developers know the perimeter.

Site Clearing

Site clearing is an important step in excavating a site.

The ground must be completely cleared and leveled before a site can be developed. This initial process begins with clearing any trees and their roots that might be in the way. The site workers will also remove any structures or objects within the ground, buildings, or obstacles that might be sitting on the excavation land.

Soil Testing

A soil testing will be done to check its potential structural integrity to ensure it can withstand a normal force great enough to support the buildings that will be developed eventually. They'll also test how well the soil absorbs water to check how likely the area is to flood.

Geotechnical Site Investigation

Similar to the soil testing process, investigators will examine the rock composition within the area and the groundwater conditions of the excavation site. This is very crucial for understanding how to build a foundation for the structures that'll sit on the surface.

Site Plan Design

This is a vital step in the pre-build phase of site development. The site plan entails all of the information about the site, like where buildings will be located, where access roads will be built for construction vehicles, where supplies will be stored to be easily accessible, and where drainage and septic systems will be built.

Hire a Reputable Excavation Contractor

At Shilling Excavation, we take safety seriously and do everything to ensure the safety of our workers and the excavation site. Whether you need an excavator for a small job or an extensive contractor project, you can depend on us to do the job safely and efficiently. This is just one of the many reasons customers continually choose us over our competitors. Contact us today!

What Happens During House Pad Preparation

Proper house pad preparation is critical for a solid and secure foundation while building a new house in. You can't build a pole barn without an adequately prepared pad, just like you can't paint a masterpiece without a blank canvas.

house pad preparation

The house pad preparation consists of numerous critical procedures to ensure the site is ready for construction. Earthmoving services are essential in this preparation, as they provide the necessary equipment and experience to execute the job efficiently and effectively.

What is House Pad Preparation

Pad preparation is simply the process of preparing a building site. The first step in prepping a pad is to remove any organic material, which includes every part from the grass and trees to compost and manure. 

The pad must then be leveled within a couple of inches. The pad must be at least 6 inches taller than any area within 8 to 10 feet of the building's measurement; this can be accomplished using a road base. 

Why is House Pad Preparation Necessary

Each phase in your land preparation serves a distinct purpose for your structure. 

Organics must be eliminated since they will degrade and leave a hole in their wake if not. All four corners of the pad must generally be level for your building to be correctly erected, and the site must be at least 6 inches taller than the surrounding region for precipitation to flow away from the building. 

What Happens During the Process

Site preparation is the initial step in home pad preparation. This entails clearing the area where the house will be erected of vegetation, rubbish, or existing structures. Clearing the ground with earthmoving equipment such as bulldozers or excavators ensures a clean and level surface. 

After the site has been cleared, soil testing may be required to determine its stability and appropriateness for construction. This procedures will help identify whether any extra steps, such as soil compaction or strengthening, are necessary before moving forward with the house pad preparation. 

pad preparation for construction

Excavation begins after the site has been cleaned. This procedure entails excavating the space to the desired depth and shape for the home pad. To ensure good drainage and stability, excavation must be done correctly. Experienced operators take precise measurements and adhere to engineering drawings to build an optimal foundation for the house.

The site is compacted after excavation. The area is compacted after excavation. Heavy machinery compacts the earth and builds a firm foundation for the home pad. Compaction is critical for preventing future settling and ensuring the foundation's stability. To accomplish the appropriate level of compression, skilled operators use specialized compactors. To accomplish the appropriate level of compaction, skilled operators use specialized compactors.

After compacting the earth, the next stage is to grade and level it. This procedure uses earthmoving equipment to mold the house pad area to the proper curves and slopes. Grading ensures proper water drainage away from the house, preventing future water-related problems.

Finally, the location is ready for utility installation. This includes installing water, sewage, and electrical systems. Earthmoving services are critical in constructing trenches and channels for these utilities, ensuring proper installation and connection to the main supply lines.

Earthmoving services are important in ensuring utility installations are completed efficiently and safely. They assist with excavating the required locations for installation, eliminating any obstructions or debris that may obstruct the operation. Furthermore, these services ensure the trenches and channels are backfilled and compacted appropriately to retain the installed utilities' integrity. 

house pad preparation and clearing

Tips for House Pad Preparation

Whether you are tackling the house pad preparation by yourself or with the help of a professional, these tips below are a must-remember:

The house pad should be 5 feet larger than the building in each direction.

When preparing your pad, ensure it is at least 5 feet greater than the size of your building in all directions, including lean-tos. If your building is 3040, the preparation pad area must be 4050. If you are designing a 3040 building with a 1240 lean-to, the preparation pad area must be 5250 square feet. If you are designing a 3040 building with a 1240 lean-to, the preparation pad area must be 5250 square feet. 

The preparation pad area must be at least five feet larger in all directions than the building and any lean-tos. This additional room enables appropriate structure installation and upkeep, avoiding potential problems with a smaller pad size. 

Dumping more than 6 inches of road base is not recommended.

These ensure that the earth is compacted throughout and are referred to as lifts or layers. The entire pad would collapse if you dumped all your road bases at once since only the top layer would be compressed. 

Applying road base in layers or lifts is advised to achieve proper compaction. The equal distribution of compaction forces made possible by this technique ensures a solid and long-lasting foundation. Additionally, layering the road base when compacting aids in preventing future pad settling or unevenness.

This practice also contributes to increasing the road's overall resilience by reducing the likelihood of cracks and potholes. Additionally, the layering procedure during compaction contributes to improving the road's load-bearing capacity, enabling it to survive high traffic and bad weather. 

Don't forget to ensure your house's foundation is fairly level.

When it's time to construct your pole barn, if the pad isn't exactly 2 inches level, more leveling may be required. This will require a road foundation or another engineered fill material, costing up to $500 per load. The stability and durability of your complete construction are ensured by leveling your home's foundation. 

Extra leveling procedures could be required to preserve structural integrity if the pole barn pad is not exactly 2 inches level. These modifications frequently call for engineered fill materials, such as road foundations, which can add up to $500 in extra costs per load.  

Conclusion

House pad preparation is an essential step in building a new home. Before beginning any other house-building operations, these services are necessary. Skilled workers and specialized equipment are required to lay a solid and stable foundation for the house, which includes site preparation, excavation, compaction, grading, and utility installation. Employing expert earthmoving services enables homeowners to guarantee that their house pad is prepared to the greatest standards, laying the groundwork for a fruitful and long-lasting construction project. 

Professional earthmoving services ensure the site preparation procedure complies with all applicable permissions and laws. This helps avert future legal complications as well as ensure compliance with regional construction codes. By investing in these services, homeowners can feel secure knowing that their new residence will be built on a firm foundation, both legally and structurally. 

What are the 5 Crucial Steps for Site Preparation for Residential Construction

When most people think about the construction industry, they think of heavy equipment or picture building metal structures or frames. Nevertheless, they fail to consider the most fundamental part of the building process: the construction site preparation.

Let's look at the importance of site preparation for residential construction, how it's done, and why ensuring quality work at this stage is of utmost importance.

Where It Begins — The Initial Considerations For Site Preparation For Residential Construction

The site preparation for residential construction begins with the contractor' and engineers' technical knowledge and understanding of this procedure. So, the entire process rests in the capacity of the people in charge.

Site preparation for residential construction in one of the most important step in the construction process.

There should be a fundamental understanding of what a site needs, different types of soil, and obstruction removal that will affect how the project moves forward. Several steps are part of site preparation, including land clearing, demolition, excavation, grading, and installing water, sewer, gas, and underground electric lines.

The subsurface and surface conditions need to be inspected and assessed. This could also involve checking the present installation of underground services. It means checking whether there are or have been certain installations in the past that need to be considered or reworked.

At the same time, engineers must consider any information presented in any land surveying or geotechnical report, calculate the presence of groundwater, and the grading level needed for proper drainage to push water away from the structure.

These steps and components must be carefully considered so that the construction proceeds according to specified plans and requirements.

The Necessary Steps for Site Preparation — A Closer Look

When site preparation for residential construction is done correctly, all activities are straightforward. If constructing a building needs to be done in a specific place with tons of underground pipes, preparing the site is necessary. By having the site ready, contractors are helped in knowing where to dig and where not to dig.

A land preparation company should show professionalism and quality service.

It will prevent any issues related to underground pipe bursting. Implementing project management for construction is equally crucial because it lessens possible mistakes and delays that can lead to costly reworks.

Below are the five necessary steps to perform proper site preparation for residential construction.

1. Site Clearing

Clearing the site is the very first step in site preparation. The entire site must be in a clear and even condition. The process involves the demolishing of buildings, the removal of trees, and the elimination of any underground infrastructure. These obstacles should be cleared because they might affect the future building process. Completing the project might also be risky if clearing the site is unsuccessful. Hence, it must be prioritized once and for all.

2. Site Surveying

You might need to determine if you are building on the right block if survey pegs do not determine the building block. A surveyor is responsible for surveying the site and lining out the area where the road project or structures will be built.

The process of surveying land might not be an option but is mostly a requirement for zoning and permitting processes. Besides, surveying is the translation of the contractor's set of plans into an actual representation of the project site.

3. Soil Testing

Testing the soil is one of the most critical tasks that have to be done before the site is procured. The soil's main composition should be determined to test the ability to absorb water and examine the ability to withstand structure.

The site engineer must insist on performing all necessary soil testing procedures before commencing any structural tasks.

If the soil at the site needs to be more suitable for future projects, there might be no other choice but to look for another site with soil appropriate for the projects. A chart showcasing the different classes of soil is outlined below:

4. Site Plan Design

Soil testing is also a part of site preparation for residential construction.

After doing the soil testing, all necessary septic tanks and drainage should be installed. The next step will be modifying the design to indicate the placement of fixtures and septic tanks. There should also be a permanent record of the underground areas. A construction site is considered a living and breathing thing. Hence, it changes daily as the water tank's placements slightly change. Underground rock formations often cause changes. Using a crew scheduler superior is proven to be a helpful tool during site plan design.

Moreover, the site plan shows all newly developed access roads for temporary storage areas and construction vehicles. The site plan also depicts where the building must be placed after construction. Unlike any other steps taken during site preparation for residential construction, revisions are done in the office, and the site plan is always updated in the field.

5. Site Inspection

Inspection characterizes any proposed sites' rock, soil, and groundwater condition. A geotechnical site investigation is defined as evaluating site conditions and collecting data to construct and design the foundation of a structure. Parking lots, bridges, roads, and buildings are typical samples.

Well-planned strategy and management of a geotechnical site investigation is the primary key to acquiring correct site information. This data is generally used for structure designing with minimum surprises for effort and estimates needed. The preparation of reports and collection of geotechnical data must be considered in the following three stages.

Take a look below:

The Benefits of Quality Site Preparation

Several benefits come with quality and professional site preparation. All of these will ultimately have a lasting impact on the final structure or building that is being erected. The benefits include:

Removing Obstructions Makes The Rest Of The Job Easier

Increasing ease of access to the site for all the necessary workers and laborers. Clearing out the site removes these obstructions that might slow down further progress.

Damage Reduction

Site preparation offers many benefits.

One of the biggest benefits of proper construction site preparation is that the right foundation sets the stage. With good site preparation, there is less possibility of damage to the structure or encountering problems once construction starts.

Increases Lifespan

When the site is prepared with utmost caution and precision, it ensures quality and long-lasting stability for the project.

Get the Right Foundation & Site Preparation

So whether you are looking for full site preparation for residential construction or need a particular service like site clearing, leveling, excavation, or grading services like phasing, staging, compaction, or barrier, we at Shilling Excavation are here to take care of your business. We are experienced professionals with the highest quality training and equipment to ensure your construction site takes off correctly.

5 Fundamentals to Efficiently Build a Driveway with Excavation

Driveways are an understated asset of any property, be it residential or commercial. Properly build a driveway with excavation and it significantly boosts your property's functional and cosmetic appeal, raising its commercial value and capability to suit your needs.

A well-built driveway lets occupants park their vehicles hassle-free while also allowing them to walk and drive safely to and from the property’s premises. Aside from these practical reasons, a polished driveway will also let your property stand out—raising its future salability.

So if you are looking to build or renovate your worn-out driveway, here are 5 things you should anticipate and prepare to build a driveway with excavation:

Make your end goal clear

Whether you are building a new driveway from scratch or looking to improve your current one, arriving at a clear vision of what you want and what you need can help make the next steps easier to tread. Considerations such as materials, cost, and even the contractors you will hire will all depend on the vision you have for your driveway.

Commonly, planning starts with knowing the cost restrictions. This is where the size of your driveway comes into play. For instance, using gravel can be the wisest choice, especially if your driveway is spacious. However, the more expensive brick, pavers, or stamped concrete might be feasible for smaller driveways. Keep in mind that larger driveway areas do not necessarily entail a larger construction costs.

Next, what is the look you are going for? If you want the traditional concrete or asphalt look, a bricked driveway, or a lower-maintenance gravel driveway, a clear target will help make the construction and transactions smoother. However, you would have to keep in mind that not all of these materials are resilient in all climates, with some even cracking or shifting over time.

Paving slabs and pavers are some of the stone materials used to build a driveway with excavation.

Even if you are unsure about some specifics of your driveway, having a general vision will help narrow down your options and help you decide the best option according to your budget, function, and visual requirements.

Hiring experts will go a long way

In choosing the right excavation contractor for your project, remember that there are non-negotiable factors your contractor should bring to the table. At first glance, hiring amateurs might look like the cost-effective route to build a driveway with excavation, but the process can be unexpectedly rigorous and require much priming.

Ensuring all technical due diligence is done correctly greatly helps in giving you a driveway that can withstand extended stress, allow smoother and safer transport by staying even for a long time, and overall saves you bucks from minimal maintenance work or repair jobs.

Much like any construction project, you get your money’s worth when you get the job done right the first time. Using the right equipment, tools, and expertise, a professional excavation contractor helps accelerate the project timeframe, which can be a huge cost-saver.

Professional contractors use specialized tools and equipment to build a driveway with excavation.

For instance, some excavation services providers can provide end-to-end services for your driveway installation. From site analysis and planning, excavating to make way for your driveway’s foundations, installing drainage infrastructure, paving to evenly lay your chosen material, landscaping to give your new or improved driveway a polished look, up to cleaning up the site from debris and equipment.

Choose the appropriate driveway foundation

A long-lasting and high-quality driveway relies on its foundations. This is why choosing the appropriate substructure for your driveway is one of the major determinants of its shelf life and deterioration rate.

Once the excavation is done, there is now a void that needs to be repleted with a stone and gravel base. How thick this foundation should be will depend on your property’s soil type. For instance, porous soils such as sandy ones will typically only require 4 inches of stone and gravel base since this soil type drains water quickly. On the other hand, for clay-type soils, 8 inches of stone and gravel base is needed since it requires more time for water to pass through.

This is why site analysis and planning is a crucial part of preparing a site for construction. Determining the soil quality and terrain helps your contractors choose the best-suited soil type for your driveway, letting them appropriately prepare and install structures that will last longer.

However, be on the lookout for contractors who skimp out on the foundations so they can quote you a lower price. When it comes to hiring excavation professionals, a lower upfront cost will not necessarily mean greater savings.

Watch out for your driveway drainage

Just like any construction, moisture is one of the leading causes of erosion and cracking in your driveway. Aside from this, excessive water can cause molding in your driveway, which can be an eyesore as much as it is a hazard for walking.

Building a driveway with proper drainage prevents water from pooling, which can cause holes and cracks in your driveway.

Driveway drainage allows surface water to slide away onto the ground instead of pooling into your driveway. Professionals who build a driveway with excavation know to prepare the drainage infrastructure ahead of time, which can come in the form of a sloped driveway or a channel drain system.

Without proper drainage, the pooled water from your driveway can head toward your house or commercial building and eventually seep through its interior walls and floors. Aside from being a structure hazard, this dampness and mold can also cause health problems for its occupants.

Take care of your new driveway

Once your new or improved driveway is fully installed, avoiding putting any weight on it during the first few weeks is crucial to prevent early damage. For the first 72 hours or 3 days, allow the driveway to cool completely. If it is unavoidable to walk on it, wait for at least 24 hours before you walk on the freshly-laid driveway.

For vehicular use, however, the heavier load requires more time before your new driveway can bear its full weight without taking damage. Avoid driving on it for the first 72 hours or 3 days, and definitely avoid parking on it for the first 14 days. Note that heavier vehicles such as campers or trucks will require more time before your driveway can safely accommodate them.

Although a driveway is generally low-maintenance, it is still important to administer regular maintenance and cleanup work on it so you can prevent potholes, bumps, crumbling, or cracks.

Final word of advice

Much like any project on your property, using high-quality materials and hiring qualified professionals to get the job done greatly determines not only the final result of your driveway but the smoothness of the experience as well.

Although building or renovating your driveway does not necessarily cost an arm and a leg, ensuring you use top-quality resources for its construction gives you a resilient driveway that can easily withstand years of use and serve your needs with minimal issues. Build it right the first time, and you will find your return on investment on your new or renovated driveway worth every penny.

At the end of the day, a driveway’s purpose is to carry heavy loads such as vehicles or equipment for extended periods. Properly priming your driveway and equipping it with the appropriate substructures and materials saves you from expensive rework construction, minimizes maintenance work and potential headaches in the long run.